Monday, June 30, 2008

Salmon Zucchini Quiche

I had some friends over last weekend - it was a no-reason-eat-&-be-merry session and it was good fun. I really do enjoy having company over and filling up the apartment with good positive energy over a hearty meal.

When I was growing up, my parents constantly entertained. Cousins, aunts, close friends, truckload of relatives always seem to be pouring in from somewhere. My mom will be in the kitchen yelling at dad for mucking up her sauce (or one of us for stealing a piece of juicy, tender chicken). The house was almost never quiet. It was filled with noises and now that I live away from home, it does feel weird when it's becomes too noise-less.
Anyhoo, the salmon zucchini quiche was a hit and Mr. G even went as far as putting a price to the last slice, offering it to the highest bidder. Obviously, I put a stop to it. If someone should be making a profit over the food, it should be me. :D

Now for the recipe:

Salmon Zucchini Quiche (serves 8)
-------------------------------------------------------------

  • Instant shortcrust pastry
  • 1/2 an onion, peeled and finely chopped
  • 1/2 a zucchini, sliced
  • 100g cheddar cheese
  • 100g parmesan cheese
  • 10 cherry tomatoes, halved
  • 4 large eggs, beaten
  • 1/2 a can of pink salmon (200g)
  • 200ml tub creme fraiche
  • salt & pepper

Method:
  1. Preheat the oven to 190*c/ 375*F.
  2. Place a sheet of shortcrust pastry on a 20 inch oiled quiche tin. Trim any excess pastry with a knife.
  3. Prick the base all over with a fork and bake in the preheated oven for 15 minutes.
  4. Remove pastry from oven and brush with a little of the beaten egg. Return to the oven for another 5 minutes.
  5. Heat some oil in a frying pan and gently fry the onion and zucchini for about 4 minutes until soft and starting brown. Transfer into the quiche tin.
  6. Sprinkle cheese evenly and top with the halved cherry tomatoes and salmon.
  7. Beat the egg and creme fraiche and season with salt and pepper.
  8. Pour the mixture into the pastry case and bake in the oven for 35 - 40 mins or until the quiche is golden brown and set in the centre.

Wednesday, June 25, 2008

Chewy Chocolate Chip Cookie

I'm not quite a cookie sort of girl. But (there's always a 'but') I do love Subway chewy chocolate chip cookies and I can never have enough of those. It's crunchy on the outside yet gooey chewy doughy on the inside. Yum!

I found this recipe on Baking Sheet and decided to give it a go. I must have baked it too long cos my cookie ended up crunchy. *sigh* I have to say, they taste great. They're the dunk-able sorts. The type you can soak in a glass of milk and eat it milky-soggy. Hmmmm....

Chewy Chocolate Chip Cookies (makes 18-24 large cookies)
------------------------------------------------------------------------------------------

  • 2 cups plain flour
  • 1/2 tsp baking soda
  • 1 tsp salt
  • 3/4 cup butter, melted and cooled until just warm
  • 1 1/2 cup brown sugar
  • 1 egg
  • 1 egg yolk
  • 2 tsp vanilla extract
  • 1 1/4 cups chocolate chips

Method:
  1. Preheat oven to 160c (or 325F).
  2. Line a baking sheet with parchment paper.
  3. In a medium bowl, whisk together flour, baking soda and salt.
  4. In a large bowl, whisk together butter and sugar.
  5. Beat in the egg, egg yolk and vanilla.
  6. Stir in flour mixture, followed by chocolate chips.
  7. Arrange mixture unto tray and pat lightly so the cookie is an even thickness, not a ball shape. Cookies will spread as they bake and this ensures a more even spread.
  8. Bake for 15-17 minutes, until just turning light brown all over.
  9. The edges should only be very slightly more brown, if at all, from the rest of the cookie.
  10. Allow cookies to cool before removing them from the baking sheet.

Tuesday, June 24, 2008

When Did You Last Give Yourself Flowers?


When was it? Last year? Five years ago? Never?
I used to have a housemate who bought herself flowers from time to time. Another girl and I thought, what a waste of money. To tell you the truth, I think we were just jealous.

Where's self-love in our society? You say self-love and someone goes 'What'd you say? Self-love? That's like kissing yourself in the mirror. Ewwww...'

Buy yourself flowers.

Don't wait for your/a man to buy them for you.

Life isn't going to wait for you till that happens.

A meteor might just hit you in the head.

Or somewhere worst.

So go, go buy yourself some flowers.

Go forth and be happy.

Super simple shortbread cookies: Part 2

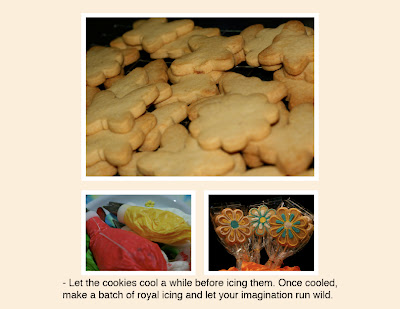
Technically, the recipe is complete. But I somehow felt it was slightly rushed. So here's the second part of the recipe.


Royal Icing Recipe:

2 Large Egg Whites
2 tsps Lemon Juice
3 Cups (330gms) icing sugar (sifted)
Gel food coloring of choice

In a clean grease-free bowl, beat the egg whites with the lemon juice till it develops some body. Then, slowly add the icing sugar and beat on low speed till fully combined. If the icing is too runny, add more sugar till desired consistency is acquired.

Store the royal icing in an air tight container till its ready to be used.

*note: When piping on designs, its best that the royal icing not be too soft/runny to prevent the design from losing its shape. Gel colors are the best choice when coloring icing because of the intensity of the colors without compromising the consistency of the icing itself.

If, at the end of this recipe you still find yourself too lazy to bake your own cookies, feel free to order them from me. (Shameless plug)

Monday, June 23, 2008

Khmer Fish Curry

This is my first food community project. Every month, Nicole from For the Love of Food has a foodie event called: Taste & Create. Nicole's job is to partner food bloggers and get us to cook something from our partners' blog. It's like picking a menu from a random restaurant but instead, we're our own chefs :) It's a pretty good way to cookcialize.

This month, my partner is Lauren from I'll Eat You. I decided to try her recipe for Khmer Royal Catfish. I was in Cambodia earlier this year to visit schools around Phnom Penh and Siem Reap for disadvantaged kids. I had been working to collect digital cameras to be given away to the students so that they could take pictures of their day-to-day lives. The pictures were to be put into a book and sold to raise funds for the schools to buy computer and such. So off I went solo, to discover the humble people, their lovely manners and generosity (even though they had so little themselves) and their courage to move on from a bitter past (more about my visit here).

The minute I saw Lauren's post I knew I had to give it a go.
Note: I've changed the original recipe according to my taste buds and items I had in the fridge. Go here for the original Lauren's Khmer Royal Catfish recipe.

Khmer Fish Curry (serves 2)
--------------------------------------------------------
  • 2 tbs vegetable oil
  • 1 fish fillets (about 400grams)
  • 1 cup coconut milk
  • 1 tbs fish sauce
  • 2 tsp sugar
  • 4 kaffir lime leaves, de-veined and julienned
  • 1/2 cup water
for the paste:
  • 2 tbs hot paprika
  • 1 1/2 tbs sliced lemongrass
  • 3 garlic cloves
  • 2 medium shallots
  • 5 kaffir lime leave, de-veined
  • 2 tsp chopped ginger
  • 3 tbsp lemon juice
  • 1/4 tsp turmeric
  • 1 1/2 tsp shrimp paste
  • 1/2 cup water

Method
1. Put all the paste ingredients in a blender or food processor, combine till smooth and set aside.
2. Heat oil in a wok over med-high heat.
3. Fry the fish until golden brown. Set aside, covered, to keep warm.
4. Cook the paste and for 2 minutes, stirring constantly, until aroma is released.
5. Add coconut milk, fish sauce and sugar. Cook 5 minutes more, stirring constantly.
6. Remove from the heat and add fish. Let sit for 1 to 2 minutes.
7. Transfer fish and sauce to a platter, garnish with julienned lime leaves. Serve with rice.

Saturday, June 21, 2008

Cauliflower Mix Vegetable


This is my favourite dish. I can eat this whole dish by itself though it taste better with steam rice. The main ingredient is cauliflower. Together with carrots, the gravy tastes sweet and fragrant when fry with chopped garlic. The grey oyster mushroom blends in very well. Here is the list of ingredients


Ingredients:
(serves 2-4)


350g cauliflower (cut into small florets)
75g of carrot (sliced thinly)


50g grey oyster mushroom (cut into small cubes)
20g pork meat (sliced thinly)


3 cloves of garlic (chopped)

1/2 tablespoon of oil
2 tablespoon of water

Method:

  1. Heat up pan or wok with oil in medium to high heat.
  2. Add in the chopped garlic. Stir fry the garlic till turn golden brown. Then add in the sliced pork (you can replace pork with beef or chicken). Stir fry the pork for about 1min.
  3. Add in the cauliflower and carrots. Mix the ingredients together.
  4. Add in the water. Close pan or wok lid. Let it cook for about 1min.
  5. Lastly add in the grey oyster mushroom and 1/4 teaspoon of salt. (You can replace the oyster mushroom with button or Champignons or cup mushroom).
  6. Stir fry all the ingredients for about 1min.
  7. Close pan or wok lid. Let it cook for about 5mins or when the cauliflower is quite soft.
  8. Serve while it is hot.

Thursday, June 19, 2008

Learning


I'm not a very picky eater. However, there are certain things that I do not eat. One of them is tomato, especially the raw ones! Back home, I used to pick out the slices of raw tomatoes from my burger/sandwich and pass them to my dear friend, Gillie whenever we had meals together.

My family and friends would occasionally receive cockles from my plate of char kueh teow. If I were to eat alone, you would see a row of cockles lining up nicely around my plate as I picked them out while eating. :D

The only time I ate bananas was when I had banana split or banana fritters. Somehow, I never ate it on its own. And there is absolutely one thing that I do not eat. Egg yolk!! *yuck* The only time I had to eat it was when it's scrambled or steamed. That's just because I couldn't pick it out! *grrr*.

Ever since I came to Melbourne, I've learned to enjoy different kinds of food. Thanks to my guinea pig and cooking experiments, I've become more adventurous and started trying food that I did not fancy in the past. I've begun to use tomatoes in my cooking. They actually taste quite good! In fact, nowadays I have them raw too. ;) Gillie will not be getting slices of raw tomatoes from me anymore. :P

For the first time in Cheeky history, I actually finished the salted egg yolk in my ba chang (made with Monkee) the other day. It's not too bad. I wonder why I didn't like it in the past. I guess I shall be eating the salted egg yolk from my mooncake (to be made with Monkee? ;)) in the future too! At the moment, I think I'll still say no to runny egg yolks! *run*

Eggplants, baked beans, oranges.. I'm slowly learning to like them. And maybe, just maybe, I might try some durians when I go back to Malaysia for a holiday trip. haha.

One thing still puzzles me though.. why would someone who eats everything, refuses to eat celery? I like it. Hmmm..

Is there something that you do not like to eat as well?

Quote of the day ~ Learn from Yesterday, Live for Today and Hope for Tomorrow ~

Ba Chang

When I called home last weekend and spoke to dad, I told him about this experiment. He excitedly told mum and I could hear mum in the background reprimanding dad for lying. I can understand her skepticism really because you see, a long time ago, I, the little one who's always up to some mischief; the grudging, grumpy house elf - swore that I would never cook.

So to attempt this, personally, is no small feat. And I'm also going to show you that if this monkee can do it, so can you.

Ba Chang or Zong zi is a triangular-shaped glutinous rice dumplings wrapped with bamboo leaves and stuffed with varied ingredients. It's also a good thing that this is only made once a year because I can imagine it is quite a pain to do it daily. (I realized, amidst my curses over my messy wrapping, how much I miss my mum.)

Ba Chang - which is translated from the Hokkien dialect as 'meat dumpling' - is a festive food usually serve in mid-June to celebrate the Dragon Boat Festival. If you can't be bothered to make this and still love to try some, you can usually find them in good old China town.

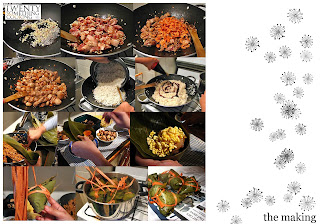
I should note here that I was not alone in making this. I had two extra pair of hands and I must thank them for being such good kitchen helpers. Because I was tied to stove most of the time, I couldn't be bothered with the photos. Mr. G and cheeky were brilliant. Patiently, chopping up the ingredients and documenting the making of ba changs. If I'm not mistaken, the video Mr. G is working on will soon be done. So thanks guys, for all your hard work. :)

Now, for the recipe:


Ba Chang (makes about 20 - 22)
----------------------------------------------------------------------------------------
1kg glutinous rice
Bamboo leaves and hem/ raffia string for wrapping

Filling:

  • 400g belly pork or de-boned chicken meat
  • 150g dried mushrooms,
  • 200g dried chestnuts
  • 10 salted egg yolks
  • 100g dried prawns - soak in warm water, remove the impurities then chop into small pieces.
  • 100g split green peas

Method:

{Overnight}
  1. Heat a large pot of water. When water starts to boil, place bamboo leaves and hemp strings in. Make sure bamboo leaves and strings are fully immersed in water. Continue boiling for 10 minutes. Turn fire off and let bamboo leaves and strings in water overnight. Remove leaves and strings from water before you need to use them.
  2. Soak glutinous rice, beans and dried chestnuts overnight.
  3. Marinate pork overnight with 2 tsp of five spice powder, 2 tbsp of vegetable oil, 1 tbsp of light soy sauce, 1 tsp of salt, 1 tsp sugar, 1 tbsp rice wine, pepper
{In the morning}
  1. Dried shrimps and chinese mushrooms can be soaked the next day as they turn soft relatively fast.
{The day itself}

Pork:
  1. Heat oil, saute shallots and garlic until fragrant
  2. Add pork. Cook for 5 minutes.
  3. Add dried shrimps, chestnuts, mushrooms. Stir well and set aside.

Rice:
  1. Heat oil, saute shallots and garlic until fragrant.
  2. Add rice, stir fry for 5 to 7 minutes.
  3. Add 1 tbsp five spice powder, 1 tbsp dark soya sauce, 1 tbsp soy sauce, 1 tsp salt and 1 tsp pepper. (If you feel that it needs more seasoning, go with your gut instincts)
  4. Stir thoroughly till heated through. Set aside.
{To Wrap}
  1. Take two bamboo leaves, make them overlap slightly and fold into a cone.
  2. Put 1 tbsp rice into the funnel base.
  3. Add 1 tbsp filling and a piece of salted egg yolk.
  4. Add beans in.
  5. Cover with some more rice.
  6. Fold leaves over rice to form a triangular prism.
  7. Tie with hem/raffia string.
{Cooking}
  1. Boil a large pot of water and add 2-3 tsp sea salt.
  2. Drop the bundles of dumplings in and boil for 1 1/2 - 2 hours over medium-slow fire.
  3. Top constantly with boiling water to maintain level of water at all times.
  4. When cooked, remove the dumplings and hang to dry.

Note:
Dumplings can be stored in freezer for at least 1 month. Steam or microwave dumplings before serving.


Wednesday, June 18, 2008

Baked Eggplant with Miso


I've heard a lot about eggplant with miso or nasu dengaku from my flatmate, Mr. P. Mr. P's pretty fabulous at dishing up some Japanese cuisines, especially when he entertains. However, my first encounter with the eggplant dish was at my favourite Japanese restaurant, which had proper Japanese chefs instead of Cantonese-spewing Hong Kong men.

The frustrating fact that I've heard so much about it and have never tasted it (Mr. P confessed he's made it twice before - when I'm not around) made me pretty determine to order the damn dish. And he was right - it is good and I absolutely love it!

I was very excited when I saw it in the weekend newspaper. I had an eggplant lying in my fridge for weeks and this was the perfect chance to use it. I've adapted the recipe to suit one eggplant rather than eight. So, feel free to adjust the proportions according to your gastrointestinal capacity.

Baked Eggplant with Miso (Nasu Dengaku)
-----------------------------------------------------------------------------------
serves 2

  • 2 tbsp mirin
  • 2 tbsp sake
  • 1/4 cup white miso paste
  • 1/3 cup sugar
  • 1 large eggplant, halved
  • 1 tbsp roasted sesame seeds
Method:
  1. Preheat the oven to 180c.
  2. Combine the mirin and sake and cook for 1 minute on low heat.
  3. Add the miso paste and whisk until dissolve.
  4. Add sugar and stir consistently until sugar has completely dissolved.
  5. Make criss-cross markings on the eggplant with a knife (it'll allow heat to penetrate and cook the vegetable quicker).
  6. Heat oil in pan. Cook eggplant until slightly brown.
  7. Remove and brush miso mixture on eggplant.
  8. Bake eggplant for 20 - 30 minutes or until the eggplant starts to blister and caramelize.
  9. Sprinkle roasted sesame seeds and serve immediately.

Spicy Sticky Date Pudding


It's winter and there's sticky date pudding in the air. Any time to have pudding is always a valid reason, yes? I've adapted this recipe from Taste.com.au and added spices to it. Being Malaysian, I do enjoy my share of spices. It adds a lovely twist to anything.

I mean, what is life really without that? A twist. A twang. A zing. A zang.

There are some days I like my taste buds un-teased for example, vanilla ice cream. It's soothing. Comforting. Simple and plain. And whenever I feel it needs a little zhwoosh - I add 'stuff'. 'Stuff' like cherry liqueur, cherry ripe chocolate and macadamia nuts, or, like the one you see here is: Tim Tam chocolate, almonds and Kahlua . It's up to your imagination. As for me, it's always play time in the kitchen. :D Enjoy!


Spicy Sticky Date Pudding (serves 8)
--------------------------------------------------------------------------------

* 250g pitted dates, chopped
* 1 teaspoon bicarbonate of soda
* 1 1/2 cups boiling water
* 120g butter, softened
* 1 cup brown sugar
* 1 teaspoon vanilla extract
* 2 eggs
* 1 3/4 cups Self-Raising Flour, sifted
* 1/2 tsp cinnamon sugar
* 1/2 tsp mixed spice

Caramel sauce
* 1 cup brown sugar
* 300ml thickened cream
* 1/2 teaspoon vanilla extract
* 60g butter


Method

  1. Preheat oven to 180°C. Grease and line the base of a cake pan (I used a loaf pan, but that's entirely up to you).
  2. Place dates and bicarbonate soda into a bowl. Pour over boiling water. Allow to stand for 20 minutes.
  3. Using an electric mixer, beat butter, sugar and vanilla until pale and creamy.
  4. Add eggs, one at a time, beating well after each addition.
  5. Fold through date mixture and flour until well combined.
  6. Spoon mixture into prepared cake pan. Bake for 35 to 40 minutes or until a skewer inserted into the centre comes out clean. Turn onto a plate.

Caramel Sauce
Combine all ingredients in a saucepan over medium heat. Cook, stirring often, until sauce comes to the boil. Reduce heat to medium-low. Simmer for 2 minutes.

Monday, June 16, 2008

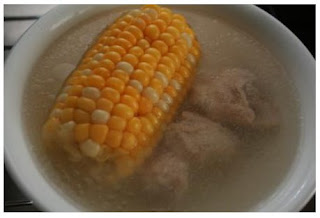
Corn Soup with Pork Ribs


This is a pretty simple soup to make. You just need to get 2 sticks of fresh sweet corn, 300g of fresh pork ribs (nearer to the spine), 2 liters of water and 2 teaspoon of salt. I manage to get the bicolor (yellow and white) sweet corn. It is taste sweeter but it is more expensive than the yellow sweet corn.


Here is the making process:
  1. Remove corn husks and clean corn with water. Cut corn into halves.
  2. Rinse and clean pork ribs with water.
  3. To remove pork smell and excess fat, boil a pot of water just enough to cover the pork ribs.
  4. Once the water boil, place pork ribs into boiling water for 1min. Drain ribs and put aside.
  5. At medium to high heat, boil 2 liters of water. Put in the pork ribs.
  6. Once the water with ribs boils, put in the corns.
  7. Wait for about 5 mins or once the water boils, reduce heat to low to medium. Leave soup to boil for 40mins.
  8. Add salt last and turn off the heat.
That's it. It is that simple !

Saturday, June 14, 2008

Memory Box

Not so long ago, I'd reformatted my laptop and unfortunately, wiped out a very important folder. Somehow I had forgotten to backup an album that contained several valuable pictures of my family. There are few things that are precious to me and pictures are on the top of the list. Once lost you can never regain them. They're gone forever.

I had but a few very old ones. Now that they are all that I have, I hold them very close to me. I've been editing a few so I can send them to the printers. It's good to have them physically - for good measures.

This is a picture of my niece taken probably two years ago. She's a gorgeous little one. Here's another one of her when she's grumpy like a troll:


That's my brother - Mr. M. She's his pet. He's now daddy of a 9-month-old tod. So he has no time for his French cookbook - you know, the one I 'borrowed' and never to be returned.

Rice Noodle Soup with Spinach

We have hot weather here in Penang, Malaysia for the past few days. My husband is feeling a bit sick. So, I have decided to cook rice noodle soup. This is a simple meal and easy to cook. It takes about 1hr to prepare the ingredients and finish cooking.


Ingredients:


400ml water for soup
2pcs of chicken drumsticks (or if you prefer 200g chicken fillet)
75g of 1/4in chunk carrots
60g of spinach
50g of diced grey oyster mushroom
3pcs of fish cake cut into halves
150g rice noodle/rice vermicelli/rice sticks

Method:
  1. Boil 200ml water in medium high heat. Add in the rice noodle when water is boiling. When water reboil, turn off the heat. Drain off the water and let some cold water run over the noodle. Set aside.
  2. Use another medium sized pot to boil 400ml of water in medium high heat. This is to make the soup.
  3. Add in the chicken drumsticks or chicken fillet and the chunk carrots.
  4. Once the soup boil, add in the spinach and diced grey oyster mushroom. Leave it for a few minute till water reboil.
  5. Lastly, add in the fish cakes and leave it till water reboil.
  6. Add salt to taste. Turn off heat.
  7. Put rice noodle into bowl. Dish out the soup ingredients and soup into bowl.

Friday, June 13, 2008

Strawberry Cheesecake

I apologize for my absence this last week. I was taking it easy. Letting my baking thumb chill a bit. But I'm back and I hope you didn't miss me too much. Let's start with a brand new week shall we?

I've never made a cheesecake in my life. So this was a nerve-wrecking experiment for me. If it wasn't scary enough, it was for Mr. G's birthday dinner. And if that wasn't gut-wrenching still, his entire family was there to play food critic. Gah... the pressure.

So here's a fool-proof recipe for those who:
a. Need a cheesecake in under an hour
b. Need a cheesecake that is both 'healthy' (O come now, strawberries are good for ya!) and tasty
c. Need a cheesecake to impress

This is sure to hit all dings.

Strawberry Cheesecake
----------------------------------------------------------------------------------

1 1/2 cups sweet biscuit crumbs
70g butter, melted
500g block Cream Cheese, softened
1/2 cup caster sugar
1 tablespoon gelatine, dissolved in 1/4 cup boiling water
2 tbsp of lemon juice
500g punnet strawberries, halved
1/4 cup strawberry jam
2 teaspoons water

Method

  1. Combine biscuit crumbs and butter, press into base of a lined and greased 20cm spring form pan; chill (or, put it in the freezer for 10 mins).
  2. Beat cream cheese until smooth. Add sugar and lemon juice and beat until smooth.
  3. Fold through the gelatine mixture. Pour into prepared base, put it in the fridge for 3 hours or like me, 40 mins in the freezer to set.
  4. Heat strawberry jam and water in the microwave for 30 seconds or until runny. Cool.
  5. Arrange sliced strawberries over the cheesecake, brush with glaze and serve.

Thursday, June 12, 2008

1000 Apologies

My fingers were itchy.

Blame it on overactive flea-bitten monkey fingers.

In my honest enthusiasm to re-decorate the blog, I deleted some 'minor' details that was previously attached to it like, for example, other food blogger links *eep*

So, if you like your link to be put up under "Other Food Bloggers"- write us a comment under this post and we'll put it up. I promise to chain my itchy monkey fingers. It'll behave. You won't see any fiddling around again ... well, at least... not so soon.

Thank you for your patience and understanding. Gomenasai.

Tuesday, June 3, 2008

Super simple shortbread cookies

My first recipe on this blog is going to be a simple one. The recipe is so simple, you'll be baking cookies in your sleep!

I love this recipe because it's not too sweet, doesn't ask for hard to get ingredients and it tastes oh so yummy! It's also great for decorating with royal icing to be given out as gifts or as favors.

Without further ado, here's the recipe.


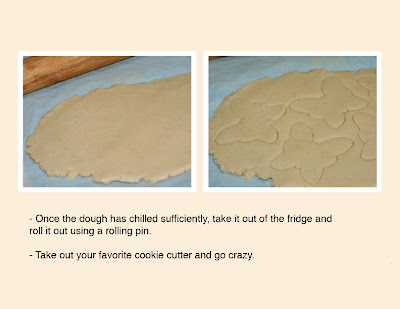
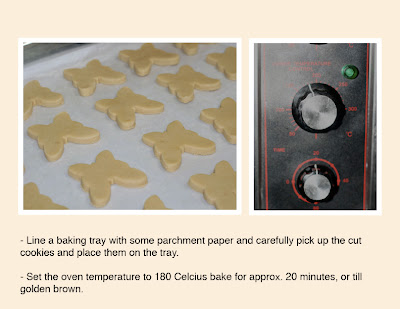
Once chilled, thaw outside for 5 - 10 mins till dough is soft and roll it out flat. (as thick as you wish the cookies to be) Cut out shapes from the dough or you could just form balls and flatten onto a lined baking pan.

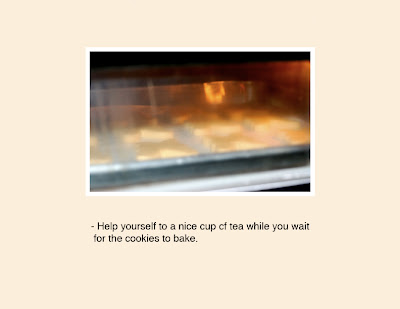
Set oven temperature to 180 celcius and bake for 20 mins or till golden brown. (Cooking time may vary depending thickness of cookies)

Once chilled, they may be eaten as is, or decorated with royal icing.

This recipe yields 18-20 5 inch cookies. Recipe may be halved.

Monday, June 2, 2008

Mushroom Soup & Spinach Pesto Toast

I reasoned, that the difference in my cooking between my early twenties and, ahem, not-so-late twenties is that I challenge myself to use more natural produce. Sure, I cheat once in a while - cubed chicken stock here, canned fruits there... but these days, I prefer wholesome, fresh, straight-from-the-cow stuff. It could do well because I've got time on my hands but I'm also valuing my health more.

We're all guilty of the instant food days - instant noodles, instant rice, instant coffee - it's no wonder we're instantly losing our minds. All rush and no fresh food makes Jane quite insane. Perhaps, my one of my values in this blog is to inspire every twenty-something out there to take the time and simply enjoy your food.

Food is not just food. It's not just to fill up. It's about nourishing your soul in the company of friends, family, partners, lovers and even your self. It's about the process. Cutting, stirring, kneading, dicing... putting energy and love into making the food... it's a relationship. It's a dance. It's therapy.

Today's food for thought: Life's short. Take time and smell the pesto.

P.S.: If you're wondering about the Baked Caramel Custard. It was beautiful, thanks.
Okay, okay, Mr. G and I finished it all up before I could take any photos of it. I'll make them again and shoot them just for your sake.

Mushroom Soup (serves 4)
-----------------------------------------------------------------------------
2 tablespoons olive oil
20g butter, chopped
1 large onion, chopped roughly
5 garlic cloves, chopped roughly
2 cups flat mushrooms diced
4 cubes vegetable stock (3.8g each)
4 cups of water
1 cup thickened cream
salt and pepper to taste

Method

  1. Heat oil and butter in a saucepan.
  2. Throw in onion and garlic. Cook, stir until tender.
  3. Add mushrooms. Stir often and leave to cook until soft.
  4. Pour in water. Partially simmer for 20 minutes. Add cubes of vegetable stock.
  5. Remove from heat. Allow to cool slightly.
  6. Process soup in batches until well combined. Return to stove.
  7. Add thickened cream under low heat.
  8. Season with salt and pepper and finally, serve.

Spinach Pesto Toast
-----------------------------------------------------------------------------
6 cloves of garlic, chopped (if you're afraid of garlic breath, reduce to *4 cloves)
4 tbsp of water
225g spinach, blanched
1/2 cup fresh basil, chopped
1/3 cup of olive oil
1/3 cup of natural seed mix with pine nuts
25g grated Parmesan cheese
sour dough bread

Method
  1. Process nuts, garlic and water until nuts are chopped.
  2. Add small amounts of basil and spinach alternately with oil. Process until smooth.
  3. Slather a slice (or how many you'd prefer) of sour dough bread with some butter. Put in the griller for about a minute.
  4. Spread the pesto on the bread. Add some cheese. Return to grill.
  5. Remove bread when cheese has fully melted.
Note: Store leftover pesto sauce in a screw-top jar and cover with a little olive oil and sea salt for up to 2 weeks in the refrigerator.

*Chicken

Bircher Breakfast

After the night's sugar fest, I thought a healthy breakfast is called for. I've had this a couple of times at cafes and it's my absolute favourite. It's really easy (that's what this website is all about right?) and cheap to make. Just throw everything in overnight and it's almost ready by morning. Trust me, your body will thank you for it.

Bircher Muesli (serves 4)
-----------------------------------------------------------------------------
2 cups rolled oats
1 1/2 cup apple juice
1 cup grated Granny Smith apple (skin on)
1/2 cup strawberry yoghurt
1 tablespoon honey
1 cup chopped strawberries, sultanas, coconut, pineapple
1 tablespoon slithered almonds, walnuts and sunflower seeds

Method
1. Place oats, sultanas, coconut, pineapple, seeds and nuts in a container.
2. Add apple juice. Stir to combine.
3. Refrigerate overnight.
4. When ready to serve, stir in grated apple, honey and yoghurt through muesli.
5. Spoon into bowls. Top with strawberries. Serve.